Showing posts with label Workshops. Show all posts

Wednesday, 9 May 2012

New Workshop

I was ashamed to find out the other day that it has been nearly two years since I last posted anything on here so thought I had better start doing some updates and give our lone contributor of late (Mick) some support. Unlike some I have no plans to de-camp to the now commercially owned Warners Group RMweb. The standard of moderation there continues to be less than impartial and piss-poor in my opinion. There are plenty of good people on there and some excellent modelling of course, but I'm happy enough to stay 'local' and blog here.

Not much actual modelling has taken place over the past 18 months whilst the house has been subject to major alteration and improvement. About 5 years ago I blogged about my then new little workshop in a large broom cupboard under the stairs. Well that has now been handed back to the domestic authority and is now full of freezer, beer/wine cooler, vacuum cleaner and other assorted household paraphernalia.

I am now resident in what was the smallest bedroom before we converted the loft and the family all moved up a room size. I've fitted the room out myself, the cabinets were custom made for me to oddball sizes by a good customer from work.


View looking down the room towards the workbench with my portable workstation under the window for natural daylight. The position to the left will have my small spraybooth permantly set up in due course. The shelf under the workbench has my DCC 'power tower' on it and feeds up to the switchable DC/DCC test track on the workstation

Those 2mil wallclocks don't half tick loudly!

I will try and do a seperate posting on the workstation soon.


Machine shelf with cupboards under and over. I've been building up a selection of Proxxon kit for a few years now and its nice to be able to keep them all out at once. At the far end is my new Warco 'big' mini lathe which with MT3 headstock and MT2 tailstock gives me much more capacity and flexibility than my old Toyo derived micro lathe.

The shelf puts the machines at a comfortable height for operation whilst standing.

View into the left corner. The TV/DVD combo was bought cheaply on offer from Asda and is used to play my collection of railway DVD's as I model! I've also started to load kit instructions onto my iPhone as PDF's and can punch them through onto the screen via a little AppleTV gadget.

The shelf seen under the workbench is to stand my airbrush compressor on.

The pictures are prints of some of Mike Raithby's excellent work, often used on the cover of December 2mm Mags.


View into the opposite corner with stock boxes up on the shelves. The work bench along the wall here is a folding one and can be dropped out of the way when I need to free up space to work on a layout module. The brackets are very heavy duty and the whole thing is rock solid when up. I can work on one 1200mm layout module at a time with access to all four sides. 'Niddbeck Bridge' at 1500mm also fits but access is only from three sides.


I suppose I am now running out of excuses for not getting any modelling done! I have dusted off the boards for my 'Haromthwaite' micro layout and am looking at restarting that soon. The other major decision I need to make is wether I should restart work on the 7200mm of  'Pool in Wharfedale' or do another small 1500mm layout to utilise the expensive flight case I had made for 'Niddbeck Bridge'. Both schemes have their attractions and otherwise.

Edward S


Tuesday, 29 January 2008

Under Cover

Are you ever doing some modelling and you get to the point where you think, "Ooh, I never thought about that!"? Well I had just such a revelation at the start of the week.

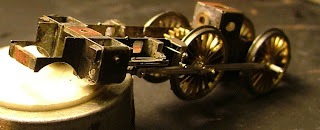
The D49 chassis is up and running very nicely and all the motion is in place. It's at this stage that I notice the piston rods protruding from the front of the cylinder blocks. "When should they have come off?" I think. "It's going to be a bugger shortening them in situ!" Indeed it is...

I can't find any reference in the instructions as to when I should have shortened them and this makes me feel a little better. Ideally I would have done it before securing the crossheads and slidebars. As it is, I now have to cut them flush with the face of the cylinder without marking the said face too much. Tricky...


The piercing saw proves ideal, but work is slow and careful. Fortunately the piston covers will mask any markings on the cylinder front and the same cover is also half etched where the piston protrudes, so it doesn't have to be dead flush.


Meanwhile the bogie has been assembled and I hope to fit the wheels later tonight or tomorrow. Onward, ever onward...

On a green note, I replaced the bulb in my modelling anglepose lamp with one of these newfangled low energy ones. At 11W it obviously uses lots less electricity, but also the light seems somehow "cleaner" than a 60W standard bulb; I am finding it a lot easier to distinguish fine detail on my work. Additionally the heat thrown off is substantially less; certainly useful once we get into spring/summer.

Friday, 29 June 2007

I Love Paris in the Springtime

Looking for pictures of a certain Ms Hilton? Sorry to disappoint, but stick around, you may be pleasantly surprised...

Minimal modelling in the last week or so. I can easily get sidetracked and recently my endeavours have been elsewhere. But progress is occurring. The springing of the loco chassis has caused a bit of consternation. The instructions mention a separate section covering the springing of the loco, but this is not to be found. Also unlike the tender I could not easily identify etched holes from where I might hang my springy bits. The chassis will be quite involved, with multiple spacers and gears etc to fit in, and so I decided to work out my own spring holes and drill them accordingly.


This proved easier said than done. Especially as I broke my last .35mm drill on the third hole and ended up using a ground stub to finish the job. And don't forget to drill the axle holes 1.6mm before you start soldering springs on! Anyway I think I'm back on track now . Photos below show the full gory detail. The back springs are a bit shorter than ideal, but I think they will suffice.


Also in contrast to Edward's modelling emporium, I post a picture of my fettling hovel. As you can see it's not quite on the kitchen table, but the space does also serve as nerve centre of the Scorton Village Store empire, computer access point (Missus' online shopping point) and general study area. The modelling tray is a godsend allowing me to only partially pack up whenever I want a clear desk.


Friday, 8 June 2007

A Place Of My Own

One thing I learnt a long time ago was that my modelling was much more enjoyable and my output much greater if I had a dedicated workspace of my own. Trying to model from a portable tool kit on the dining room table was definitely not me!

Here are some images of my new modelling den, located in a large understairs cupboard, purloined from the domestic authorities! The central heating boiler hangs on the wall in the corner so it is all very cosy and snug. Not sure why the builders fitted a radiator as well!

The project has been done on a budget, mainly by negotiating good deals on damaged/soiled stock from a local timber merchant.


This shot shows the understair return which will be my dedicated painting area. The industrial low voltage high intensity lamps with flexible necks are ex-sewing machine lights, obtained 2nd hand and very reasonably priced from Bill Rankin. A plastic desk pen drawer can be seen beneath the worktop.


This shot shows the main workbench along the rear wall, which gives me 2 workstations. 40mm thick kitchen worktop is used for the workbench, the back and sides are lined with adjustable steel shelving uprights with beech effect 'contiboard' infills, tools etc hung on square cup hooks, 6' double fluorescent batten providing general illumination. Several shallow plastic pen drawers fitted under the workbench provide further tool and widget storage. Mains power provided at the back of the bench using hi-fi style mini plugs and 6-way trailing sockets screwed to the back panels (purchased from CPC). These diddy plugs save loads of space and I standardised on them many years ago for my modelling gear.


This shot looking through the door shows shelving above, with 'Niddbeck Bridge' resting on the big shelf. Cheap cardboard postal boxes are used on the upper shelves to store kits and bits.


This shot shows the inside of the door, lined with 'contiboard' and used to store sheet plastic materials in 18"x12" poly bags, hole punched along the top , and hung on rows of 4 square hooks. Packets of wire, Evergreen strip etc also hung on hooks. Old plastic 12" hacksaw blade boxes used for storing metal sections, tubing etc.

Edward S